小王同学开发日记第四天
我的目标 成为 ContextOS布道师
✅ 任务1: 阅读 ContextOS 云操作系统 提供云研发小程序
✅ 任务2:熟悉框架:后端冰山架( Golang),前端火山架(JS+CSS)使用方法
✅ 任务3:探索如何模块化方式 从0到1快速开发一个小程序
由于时间有限,如有误,恳请大家不吝指教,万分感激
一、从PM角度分析xx设计,思维转变过来
二、从程序员角度了解代码实现
2.1 我的开发环境
window 笔记本
window 启动wsl2当做服务器(理想状态 需要运桌面,云服务器)ubuntu 22.04.5 LTS
    +-----------------------+
	| Windows 11 操作系统   |
	+-----------------------+
              |
              v
	+-----------------------+
	|       Hyper-V         |  <- 提供虚拟化支持
	+-----------------------+
              |
              v
	+-----------------------+
	|        WSL 2          |  <- 运行Linux内核
	+-----------------------+
              |
              v
	+-----------------------+
	|   Docker Desktop      |  <- 管理容器
	+-----------------------+
              |
              v
	+-----------------------+
	| Docker 容器(Linux)  |  <- 运行应用程序
	+-----------------------+

启动:ubuntu22.04
启动ContextOS(任何一个小程序都是一个ContextOS)
1
2
3
4
5
6
7
8
9
|
git clone https://shylinux.com/x/ContextOS

cd /home/money/ContextOS
source etc/miss.sh //golang依赖下载
./bin/ice.bin //启动
./bin/ice.bin admin space login 7f914c789dab8f73609ea80910ecf398
访问:
http://192.168.45.52:9020/?debug=true
|
参考:官方产品迭代小程序
官方地址:https://web.shylinux.com/s/20240903-operation
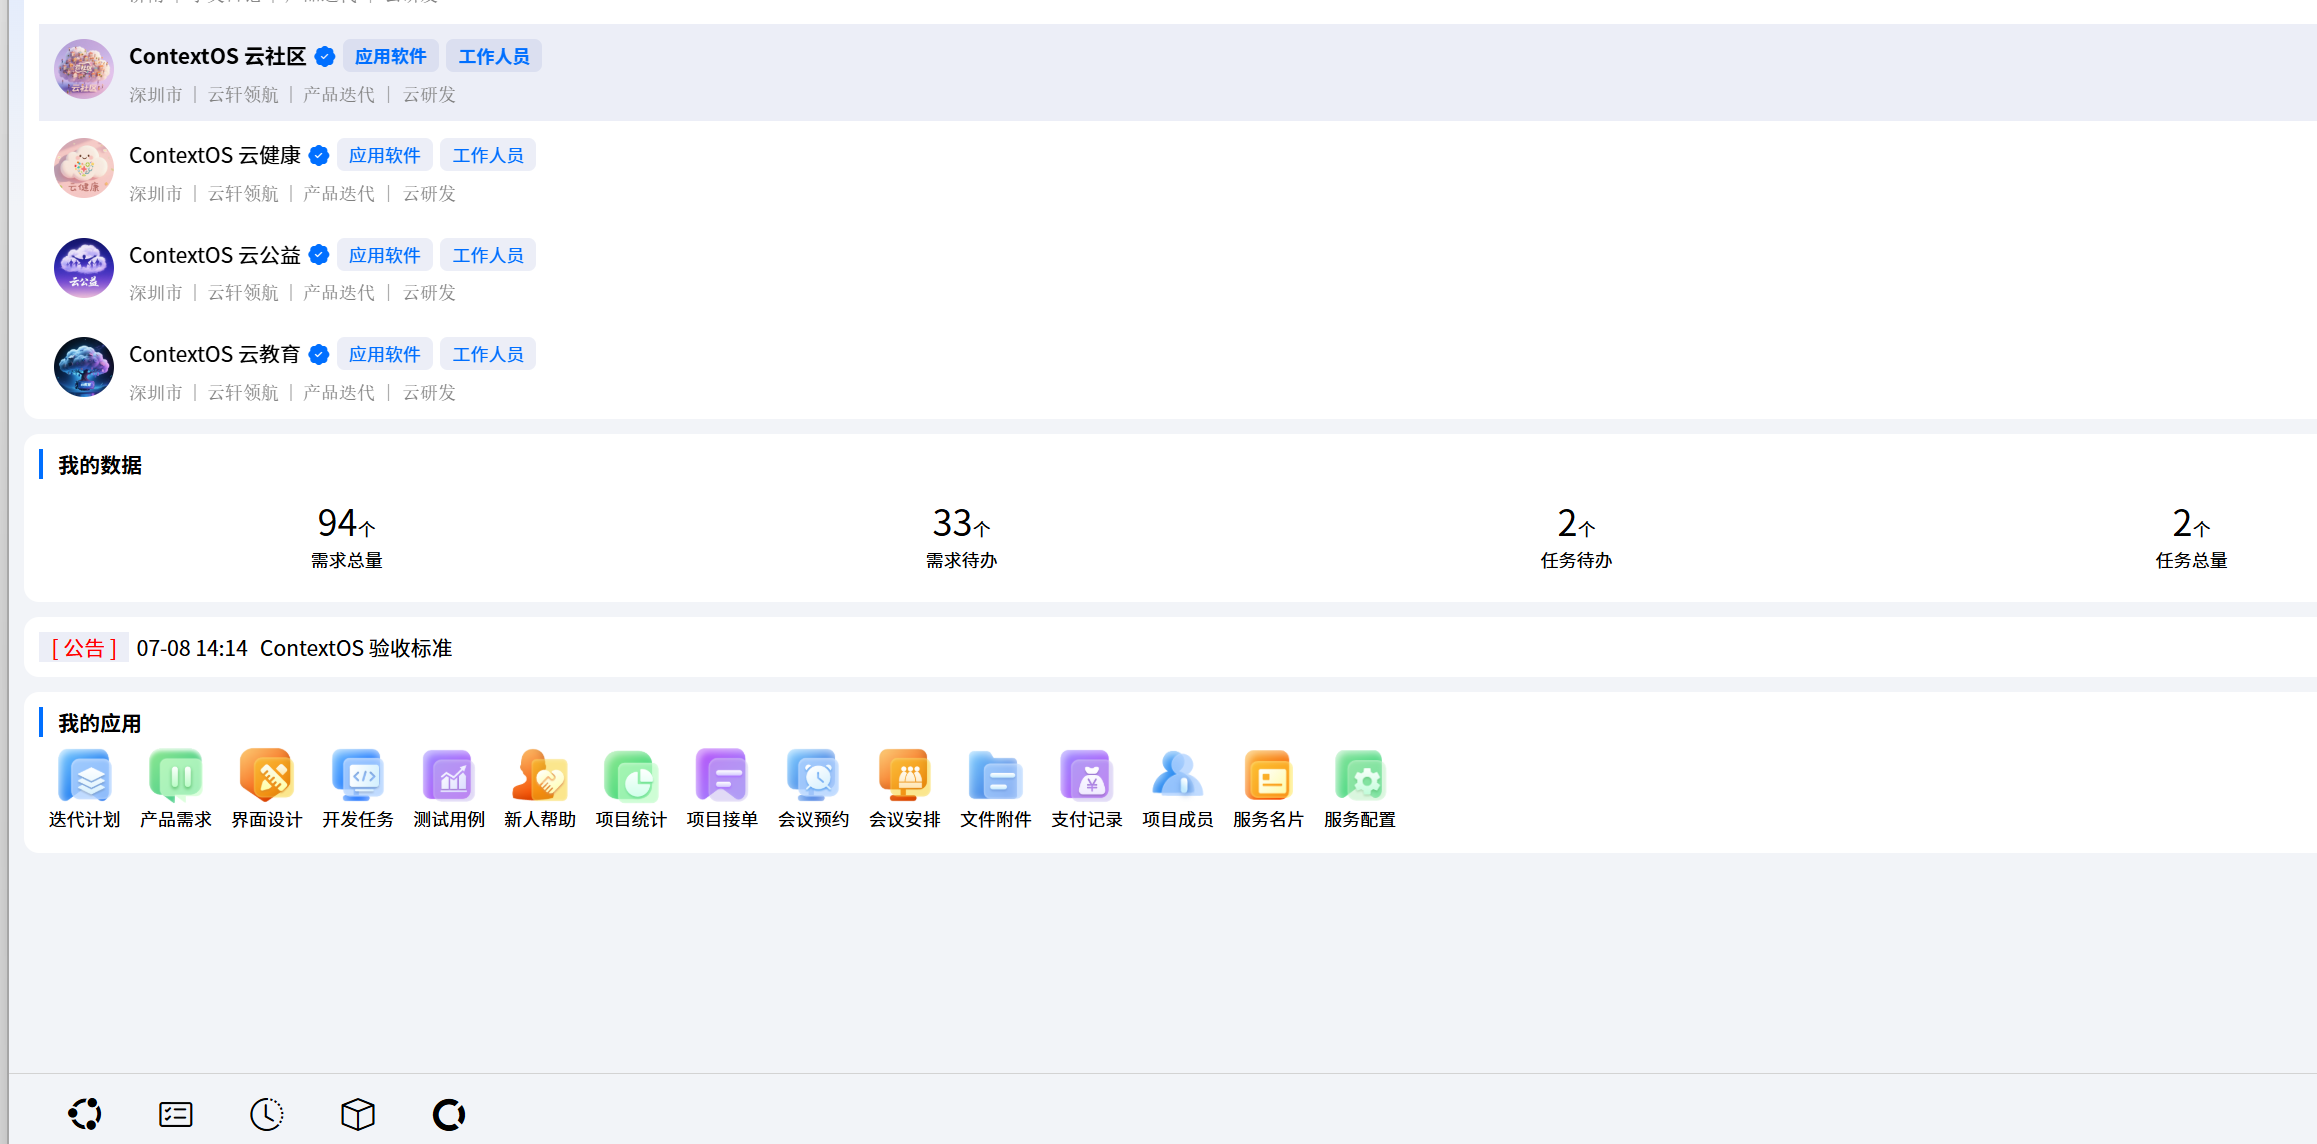
在产品迭代 小程序
不同公司 根据不同产品线 创建不同管理产品的,虽然是同一个小程序,不同产品线相互隔离。
上图 创建了云社区,云监控,云教育 不同产品。都是产品迭代小程序下创建的。
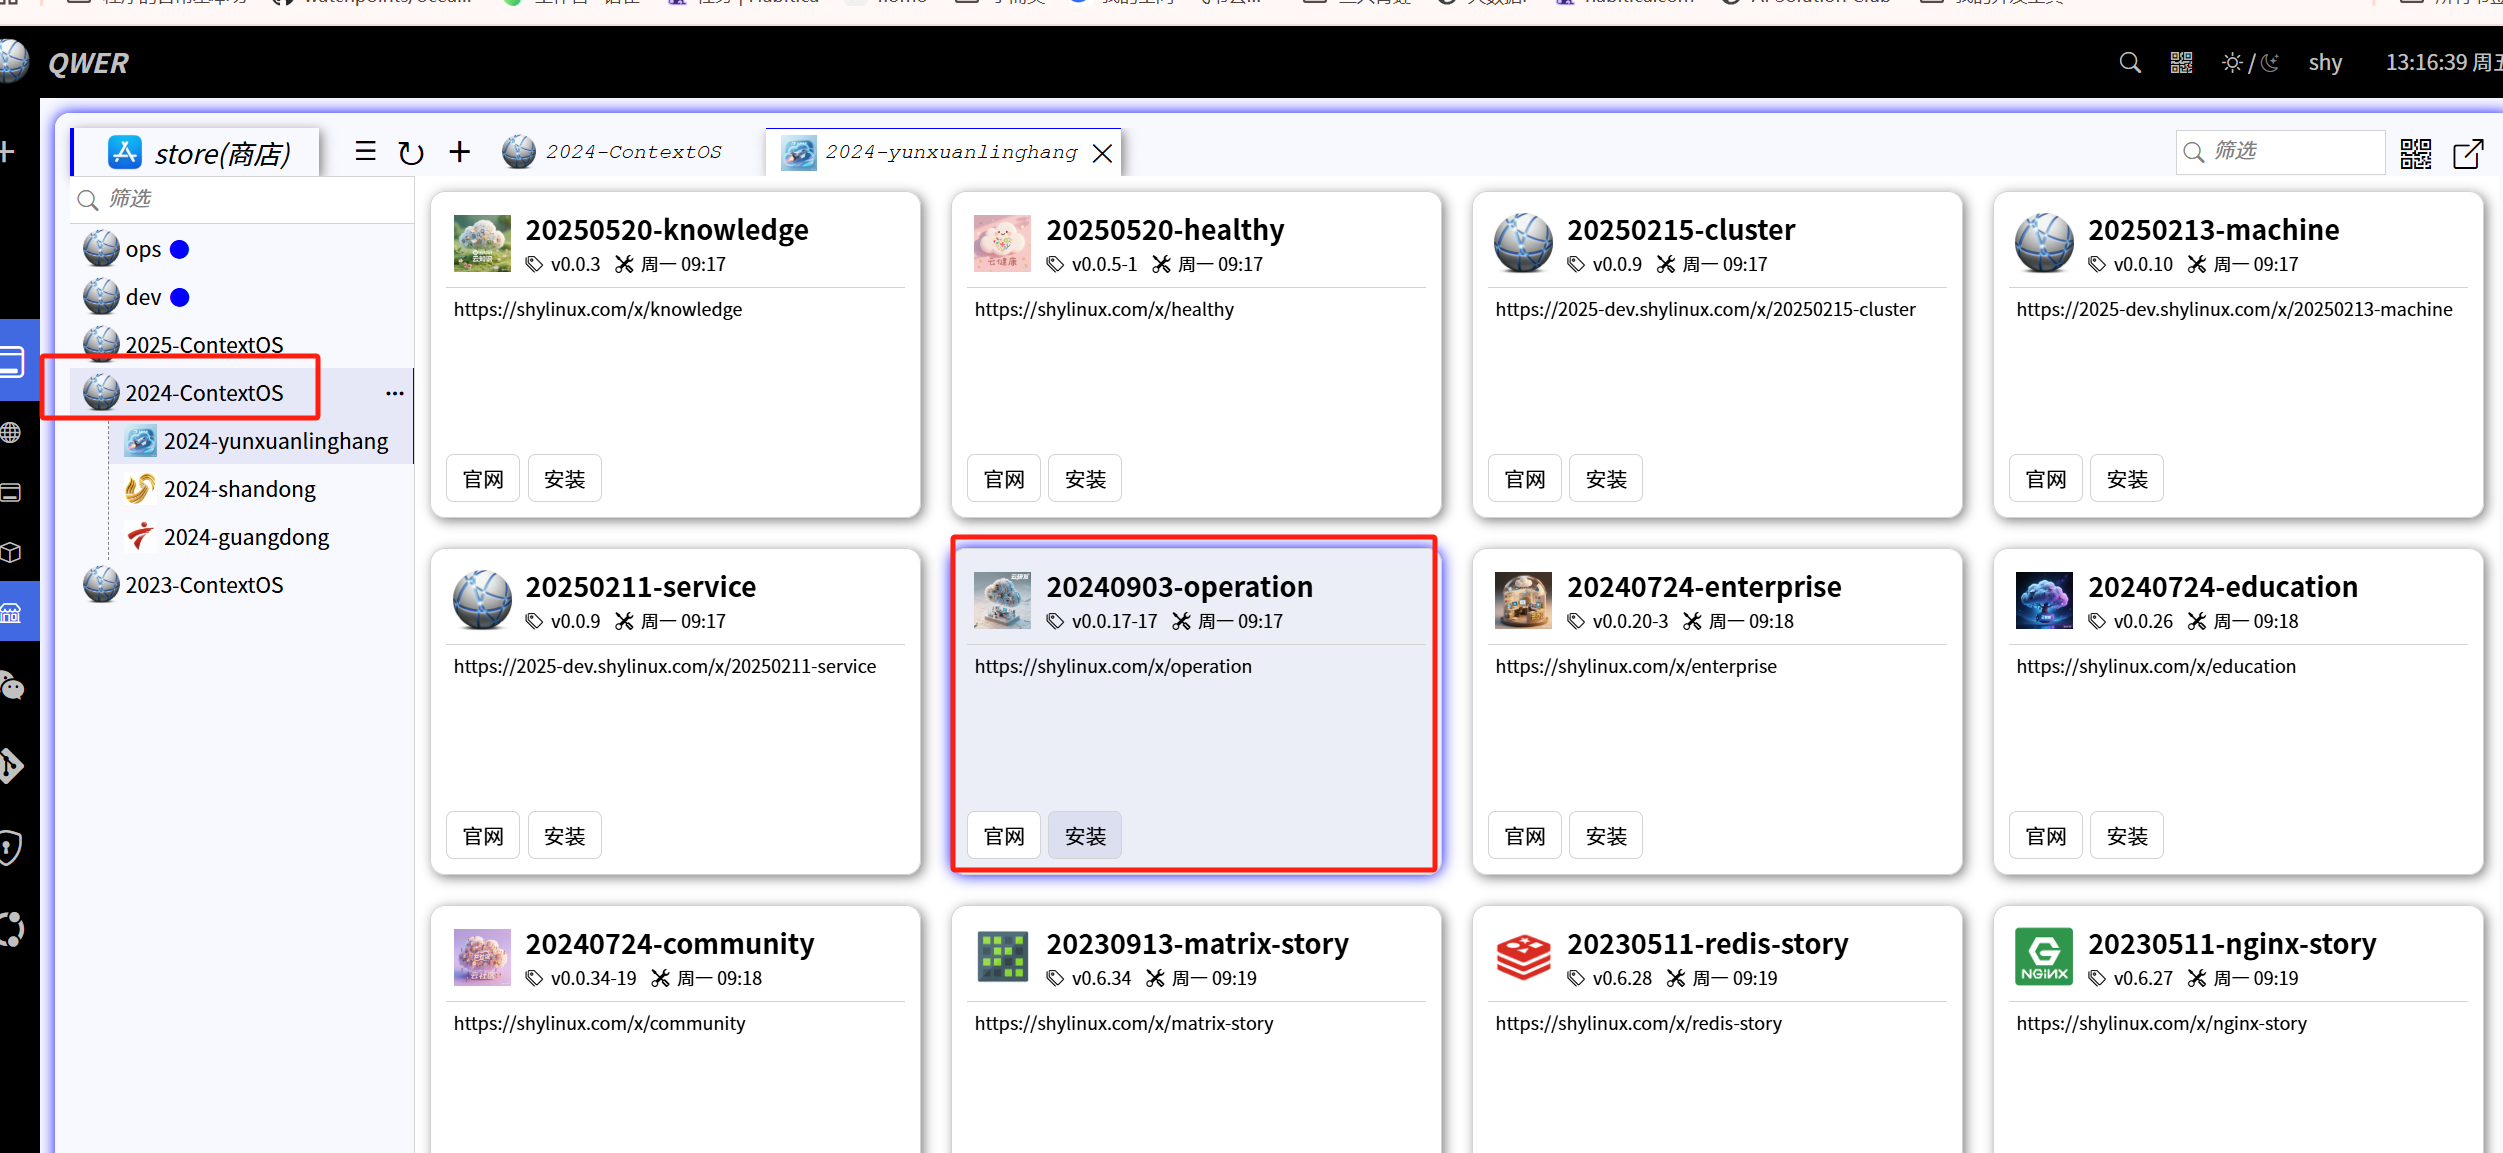
下载 产品迭代 小程序 源码
方式1:源码直接下载 git clone https://shylinux.com/x/operation
方式2:从商店下载
2.2 云主机Centos平台 2c2g跨节点访问
 1
 2
 3
 4
 5
 6
 7
 8
 9
10
11
12
13
|
//Centos平台 2c2g跨节点访问

git clone https://shylinux.com/x/ContextOS   //root//root/ContextOS
cd ContextOS && source etc/miss.sh

./bin/ice.bin

// 远程登陆的,需要授权
cd /root/ContextOS
./bin/ice.bin admin space login 507d283a760ea8238c98b4bd2599e665

登录地址:
http://101.43.226.54:9020/?debug=true
|
小提示:这个ip 是云主机内部的,需要改为对外访问的
防火墙端口 [9020]开放
2.3 配置数据库链接(默认是sqlite3)
2.3.1 你可能遇到错误1:提示链接数据库报错
错误日志
1
2
3
|
http://192.168.45.52:9020/?debug=true
❌ warn: err sql: unknown driver "" (forgotten import?)
|
解决办法:安装数据库,并配置链接
GORM 是一款流行的 Go 语言 ORM 库,
它极大地简化了数据库操作,
使得开发者能够更加专注于业务逻辑而非 SQL 语句
Ubuntu 22.04 LTS 上安装 MySQL
 1
 2
 3
 4
 5
 6
 7
 8
 9
10
11
12
13
14
|
# 查看可使用的安装包 123
sudo apt search mysql-server
jammy-updates 8.0.42

# 安装最新版本
sudo apt install -y mysql-server

# 启动MySQL服务
sudo systemctl start mysql

## 设为开机启动
sudo systemctl enable mysql

sudo systemctl status mysql
|
修改 MySQL 密码
默认安装是没有设置密码的,需要我们自己设置密码。
 1
 2
 3
 4
 5
 6
 7
 8
 9
10
11
12
13
|
# 登录mysql,在默认安装时如果没有让我们设置密码,则直接回车就能登录成功。
sudo mysql -uroot -p
# 设置密码 mysql8.0

ALTER USER 'root'@'localhost' IDENTIFIED BY '123456';
FLUSH PRIVILEGES;

//忘记密码情况
sudo systemctl stop mysql # 停止服务
sudo mysqld_safe --skip-grant-tables --skip-networking &
# 跳过权限验证
mysql -u root # 无密码登录
|
1
2
3
4
5
6
7
|
sudo vim /etc/mysql/mysql.conf.d/mysqld.cnf

bind-address            = 0.0.0.0

sudo systemctl restart mysql

mysql -u root -p -h
|
如何解决 MySQL 错误:用户root@localhost的访问被拒绝
1
2
3
4
5
6
7
8
9
|
sudo mysql -u root
mysql> CREATE USER 'admin'@'localhost' IDENTIFIED BY 'admin';
mysql> GRANT ALL PRIVILEGES ON *.* TO 'admin'@'localhost' WITH GRANT OPTION;
mysql> FLUSH PRIVILEGES;
mysql> exit;


mysql -P 3306 -h localhost  -u root -p 成功
mysql -P 3306 -h 127.0.0.1  -u root -p
|
|src/|production/issue.go|79|s.OrderItemList undefined (type Issue has no field or method OrderItemList)|
遇到的问题:
链接localhost 成功 ,链接 127.0.0.1失败,如何修改支持任意ip链接呢?
端口配置错误:3306
 1
 2
 3
 4
 5
 6
 7
 8
 9
10
11
12
13
14
15
16
17
18
19
|
[mysqld]
#
# * Basic Settings
#
user            = mysql
# pid-file      = /var/run/mysqld/mysqld.pid
# socket        = /var/run/mysqld/mysqld.sock
# port          = 3306
# datadir       = /var/lib/mysql


# If MySQL is running as a replication slave, this should be
# changed. Ref https://dev.mysql.com/doc/refman/8.0/en/server-system-variables.html#sysvar_tmpdir
# tmpdir                = /tmp
#
# Instead of skip-networking the default is now to listen only on
# localhost which is more compatible and is not less secure.
bind-address            = 0.0.0.0
mysqlx-bind-address     = 127.0.0.1
|
2.3.1 你可能遇到错误2:不知道从哪里配置,配置如何维护
现象描述:
❌ warn: err Error 1049 (42000): Unknown database ‘operation’
原因分析
- 正常项目,数据库建表是DBA事情,这个增加复杂性gorm框架解决了这个问题
- 在 Go 语言中,GORM支持Migration特性,
支持根据Go Struct结构自动生成对应的表结构,
使用 GORM ORM 库的 AutoMigrate 方法可以自动创建数据库表,确保数据库结构与定义的模型结构一致。
AutoMigrate 方法非常方便,特别适合在开发阶段进行快速迭代
解决办法:
如何配置数据库链接: 文件:main.py [文本也能执行代码]
1
2
3
|
field web.code.mysql.client

field web.code.mysql.query args `mysql operation`
|
如何类和表进行映射
 1
 2
 3
 4
 5
 6
 7
 8
 9
10
11
12
13
14
15
16
17
18
19
20
21
22
23
24
25
26
27
28
29
30
31
32
33
34
35
36
37
38
39
40
41
42
43
44
45
46
47
48
49
50
51
52
53
54
55
|
type Note struct {
db.Model
Content string `gorm:"type:text"`
CompanyUID string `gorm:"type:char(32);index"`
StoryUID string `gorm:"type:char(32);index"`
PlanUID string `gorm:"type:char(32);index"`
IssueUID string `gorm:"type:char(32);index"`
FromUserUID string `gorm:"type:char(32);index"`
ToUserUID string `gorm:"type:char(32);index"`
}
type File struct {
db.Model
Content string `gorm:"type:text"`
CompanyUID string `gorm:"type:char(32);index"`
StoryUID string `gorm:"type:char(32);index"`
PlanUID string `gorm:"type:char(32);index"`
IssueUID string `gorm:"type:char(32);index"`
Link string `gorm:"type:varchar(255)"`
Name string `gorm:"type:varchar(128)"`
Type uint8 `gorm:"default:0"`
Size int `gorm:"default:0"`
}
type Meet struct {
db.Model
Content string `gorm:"type:text"`
CompanyUID string `gorm:"type:char(32);index"`
StoryUID string `gorm:"type:char(32);index"`
PlanUID string `gorm:"type:char(32);index"`
IssueUID string `gorm:"type:char(32);index"`
FromUserUID string `gorm:"type:char(32);index"`
ToUserUID string `gorm:"type:char(32);index"`
Link string `gorm:"type:varchar(255)"`
Type uint8 `gorm:"default:0"`
Score uint8 `gorm:"default:0"`
BeginTime db.Time
EndTime db.Time
}
//`init()` 是 Go 语言包初始化的核心机制,用于在导入包时自动执行准备工作
//在模型注册(如 ORM 框架)等场景中尤为常见
func init() {
db.CmdModels("", // 空字符串参数通常表示默认操作(如注册表名)
// 核心业务模型组(产品规划)
&UserStory{}, &Story{}, &Plan{},
// 任务与问题追踪组
&Issue{}, &Design{}, &Task{}, &Case{},
// 协作与资源组
&Note{}, &File{}, &Meet{},
// 交易与缺陷组
&Deal{}, &Bug{},
)
}
|
